Common Kitchen Flooring Installation Mistakes: Expert Subfloor Guide
Flawless floor surfaces rely on unyielding structural foundations. Kitchen environments impose distinct physical stresses on floor assemblies through constant foot traffic, heavy standing appliances, and persistent moisture exposure from dishwashers or sinks. Surface materials are frequently blamed by homeowners when tiles crack or plank seams buckle. Common Kitchen Flooring Installation Mistakes. However, structural failures originate almost exclusively from hidden subfloor defects beneath decorative wear layers. Understanding how subfloor flex, residual concrete moisture, and improper underlayment choices compromise surface integrity is essential for durable residential installations.
Installing kitchen flooring requires navigating spatial interfaces, cabinet footprint boundaries, and material expansion profiles. Mistakes occur when installation teams rush surface laying without testing concrete slab relative humidity or verifying subfloor flatness tolerances. A subfloor that deviates by more than three-sixteenths of an inch across ten feet introduces severe hollow voids beneath luxury vinyl planks or ceramic tiles. Under daily foot traffic, unsupported surface planks deflect downward repeatedly, causing locking mechanisms to shear and grout lines to crumble into dust.
Preventing structural flooring failures demands treating the entire floor assembly as an integrated system. Installers must harmonize subfloor preparation, perimeter expansion gaps, specialized adhesive trowel notches, and underlayment membranes. Bypassing essential subfloor preparation steps to save short-term labor costs guarantees premature surface failure. Adhering to strict technical installation protocols protects property investments, prevents expensive tear-out retrofits, and delivers resilient kitchen floor surfaces that perform reliably over multi-decade lifespans.
Common Kitchen Flooring Installation Mistakes
Analyzing common kitchen flooring installation mistakes requires looking beyond cosmetic surface alignment to evaluate foundational subfloor engineering. Homeowners often evaluate installation quality based solely on tight plank joints or straight tile grout lines. However, catastrophic material failures usually develop slowly over time beneath visually appealing surfaces.
A frequent error during residential projects involves failing to acclimate luxury vinyl or hardwood materials to interior ambient temperatures prior to installation. Flooring planks stored in cold warehouses expand significantly when introduced to warm, humid kitchen environments. When installers pin expanding planks tight against walls without perimeter expansion gaps, internal hydraulic pressure builds up across the floor assembly. This trapped pressure forces floating plank courses upward, creating noticeable hollow peaks across central kitchen walkways.
Subfloor Moisture Testing Protocols
Testing concrete subfloor moisture levels is critical before spreading adhesives or laying underlayment membranes. High relative humidity inside concrete slabs breaks down chemical adhesive bonds over time, causing floating vinyl tiles to unbind, cup, and release foul alkaline odors.
Cabinet Footprint Pinning Dynamics
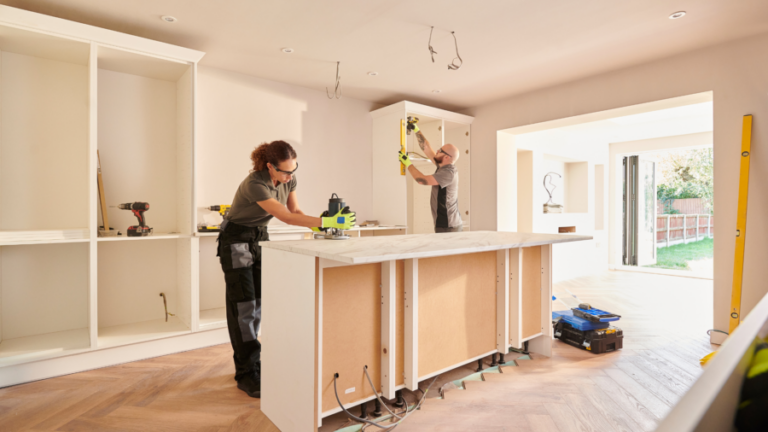
Heavy kitchen islands and cabinetry base frames must never be installed directly on top of floating click-lock floor planks. Fastening heavy cabinetry through floating floor assemblies pins the material to the subfloor, preventing natural thermal expansion and causing locking joints to pull apart elsewhere.
Deep Contextual Background
The evolution of residential kitchen floor installation techniques reflects developments in material science, subfloor structural engineering, and adhesive chemistry over the past century. Early twentieth-century kitchens relied on solid hardwood tongue-and-groove boards or heavy linoleum sheets laid over thick diagonal wood subfloors. These early installations offered substantial structural mass, though wood subfloors moved significantly with changing seasonal humidity levels, causing surface cracks.
Mid-century residential developments introduced engineered plywood subfloors and thin vinyl composition tiles laid with asphalt adhesives. While plywood provided flatter installation surfaces, thin vinyl tiles required near-perfect subfloor smoothness to prevent minor subfloor imperfections from telegraphing through the thin surface material. The late twentieth century saw the dominant rise of large-format ceramic tiles and floating laminate systems, which introduced new structural rigidity requirements for wood subfloors.
Modern luxury vinyl tile (LVT) and stone plastic composite (SPC) flooring systems revolutionized residential remodeling by promising quick, floating installations over existing surfaces. However, thin SPC locking joints are exceptionally sensitive to minor subfloor unevenness. The widespread adoption of rigid core floating floors exposed a widespread lack of subfloor preparation skills among modern installers, leading to an increase in premature joint shearing and floor bounce failures across modern kitchens.
Conceptual Frameworks and Mental Models
Structural engineers and flooring specialists utilize technical analytical models to evaluate subfloor assembly performance, ensuring installations withstand daily mechanical and environmental loads.
The Subfloor Deflection Standard Matrix
This framework calculates allowable structural floor movement under live dynamic loads, using the standard L/360 rating for ceramic tile installations. Calculating subfloor joist span ratios prevents excessive vertical flexing that shatters rigid tile mortar bonds.
The Thermal Expansion Clearance Model
This spatial model treats floating floor assemblies as continuous moving sheets that expand and contract in direct response to room temperature shifts. Establishing uninterrupted perimeter expansion gaps beneath wall baseboards allows uninhibited thermal movement across the entire floor plane.
The Moisture Migration Boundary Envelope
This environmental model tracks vapor pressure gradients moving upward from ground slabs through subfloor structures into interior living areas. Specifying continuous vapor retarder membranes stops moisture migration, protecting organic adhesives and wood underlayment sheets from rot.
Key Categories and Technical Variations Common Kitchen Flooring Installation Mistakes
Evaluating flooring installation methods requires analyzing subfloor preparation requirements, adhesive systems, and structural trade-offs across primary kitchen surface materials.
Glue-Down Luxury Vinyl Tile Systems
Glued vinyl tile offers exceptional dimensional stability and eliminates floor hollow sounds underfoot. However, full-spread adhesive applications require near-perfect subfloor leveling, as minor concrete bumps will project directly through the thin wear layer.
Floating Click-Lock Rigid Core (SPC)
Featuring integrated underlayment pads and click-lock seams, rigid core planks install quickly over smooth existing subfloors without messy glues. However, brittle click-lock seams break easily if subfloors deviate from strict three-sixteenth-inch flatness limits.
Uncoupling Membrane Ceramic Tile Assemblies
Installing ceramic or porcelain tiles over flexible uncoupling membranes isolates the rigid tile layer from underlying subfloor movement. This multi-layered assembly prevents subfloor stress cracks from transferring upward into decorative surface tiles.
Direct-Nail Engineered Hardwood Systems
Solid or engineered hardwood nailed directly to plywood subfloors provides timeless warmth and structural durability. However, wood subfloors must be thoroughly tested for moisture content to prevent plank cupping, warping, and squeaking over time.
Sheet Vinyl Perimeter-Glued Installations
Sheet vinyl offers seamless waterproof protection across high-spill kitchen zones. However, perimeter-glued installations require precise hand-scribing along wall contours to prevent unsightly air bubbles and surface buckling.
Self-Leveling Underlayment Compound Overlays
Flowable cementitious self-leveler poured over uneven subfloors creates flat, smooth substrates for all surface materials. Proper substrate priming is essential before pouring self-leveler to prevent the compound from dehydrating prematurely and flaking off.
| System Category | Subfloor Flatness Tolerance | Moisture Vulnerability | Heavy Cabinet Pinning Risk | Relative Installation Cost |
| Glue-Down LVT | Extremely Strict (1/8″ per 10′) | High (Adhesive Breakdown) | Low | Moderate |
| Floating SPC | Strict (3/16″ per 10′) | Low (Inert Core) | Extreme | Low to Moderate |
| Uncoupling Tile | Moderate (Membrane Flex) | Low | Low | High |
| Nail-Down Hardwood | Strict | High (Plank Cupping) | Low | High |
| Sheet Vinyl | Extremely Strict | Moderate | Low | Low to Moderate |
| Self-Leveler Base | Creates True Flatness | Dependent on Primer | N/A (Subfloor Layer) | Moderate |
Installation Method Decision Logic
Selecting the proper installation approach involves evaluating existing subfloor conditions, project timelines, and household activity levels:
Subfloor Flatness Inspection
If subfloor surface height variations exceed one-quarter inch across ten feet, pour a flowable polymer-modified self-leveling underlayment before installing floating click-lock planks or glue-down vinyl.
Appliance Load Evaluation
If heavy commercial-grade refrigerators or heavy marble-topped kitchen islands are planned, choose glue-down vinyl or uncoupled ceramic tile instead of floating floor systems to prevent seam separation.
Existing Substrate Testing
If installing over existing concrete slabs, conduct a quantitative calcium chloride test to measure moisture vapor emission rates. If readings exceed three pounds per thousand square feet, apply an epoxy moisture barrier.
Detailed Real-World Scenarios Common Kitchen Flooring Installation Mistakes
Scenario 1: The Floating Plank Kitchen Island Failure
A homeowner installed floating rigid core SPC planks throughout a newly renovated open-concept kitchen. Afterward, heavy custom kitchen cabinets with granite tops were installed directly on top of the floating floor planks. During summer, rising interior humidity caused the floating floor to expand. Because the floor was pinned under the heavy island, expanding planks could not shift toward wall expansion gaps. The trapped pressure caused central floor seams to buckle upward into a prominent ridge, requiring cabinet removal to rebuild the floor.
Scenario 2: The Un-Leveled Ceramic Tile Remodel
A contractor installed large-format twelve-by-twenty-four porcelain tiles over an old wood joist subfloor without verifying deflection limits or subfloor flatness. The joists flexed slightly whenever family members walked past the kitchen sink. Within four months, rigid thin-set mortar bonds began to snap beneath heavy traffic zones. Grout lines cracked and crumbled into fine dust, while several large tiles developed diagonal structural cracks across their faces.
Planning, Cost, and Resource Dynamics
Preventing installation mistakes requires allocating sufficient project funds toward subfloor preparation, moisture mitigation, and specialized underlayment materials. Skimping on subfloor prep to buy high-end surface planks is a common financial mistake that leads to structural failure.
Budget allocations must account for both surface material costs and subfloor leveling labor, primer chemicals, self-leveling cement compounds, and specialized trowels.
| Installation Phase | Cost Range per Square Foot | Primary Budget Drivers | Labor Allocation |
| Subfloor Prep & Leveling | $1.50 – $4.00 | Self-leveling compound, mechanical grinding, primer | High Labor |
| Moisture Barrier Application | $0.75 – $2.25 | Epoxy moisture mitigation membranes, testing kits | Moderate Labor |
| Surface Material Installation | $2.50 – $8.00+ | Surface material type, intricate layout patterns | Skilled Labor |
Tools, Strategies, and Support Systems
Executing professional-grade kitchen flooring installations relies on precise diagnostic instruments, specialized surface prep equipment, and correct application tools.
Pinless Digital Moisture Meters
Handheld diagnostic meters measure subfloor moisture content deep within concrete slabs or wood subfloors without damaging existing subfloor materials.
Ten-Foot Aluminum Straightedges
Long aluminum straightedges allow installers to quickly identify subfloor high spots and low dip valleys, verifying flatness compliance before laying material.
Notch-Sized Adhesive Trowels
Utilizing trowels with exact manufacturer-specified notch dimensions ensures correct adhesive coverage without over-applying glue that oozes up through plank seams.
Heavy-Duty Floor Rollers
Heavy three-section steel rollers press freshly laid glue-down vinyl planks firmly into adhesive beds, transferring glue and eliminating trapped air pockets underfoot.
Mechanical Diamond Floor Grinders
Handheld or walk-behind grinders quickly remove high concrete ridge spots, old carpet glues, and paint overspray from slabs, ensuring clean adhesive bonding.
Risk Landscape and Failure Modes Common Kitchen Flooring Installation Mistakes
Kitchen flooring installations can fail due to subfloor movement, environmental moisture intrusion, or mechanical installation oversights.
Subfloor Telegraphing
Occurs when small subfloor defects—such as screw heads, wood seams, or concrete cracks—mirror upward through thin vinyl surface layers under foot pressure over time.
Joint Shearing and Lip Disalignment
Happens when floating click-lock planks bounce over hollow subfloor dip valleys, shearing fragile plastic locking tongues and causing adjacent plank edges to stick up.
Adhesive Emulsification Failure
Occurs when high moisture and alkalis rise from unsealed concrete slabs, breaking down liquid adhesives into gooey, non-sticky residues that release installed floor tiles.
Governance, Maintenance, and Long-Term Adaptation
Preserving kitchen floor integrity requires establishing routine cleaning protocols, controlling interior humidity levels, and conducting periodic visual seam inspections.
Interior Humidity Control
Maintain indoor relative humidity levels between thirty and fifty percent year-round using dehumidifiers or central air conditioning to prevent expansion stress across wood and vinyl floors.
Appliance Leak Monitoring
Inspect water supply lines behind refrigerators and dishwashers semi-annually. Undetected slow leaks saturate subfloors quickly, rotting wood subfloors and breaking down flooring adhesives under cabinets.
Protective Felt Pad Replacement
Attach heavy-duty felt protective pads beneath all kitchen table legs and movable counter stools, replacing worn pads semi-annually to prevent deep surface gouging.
Measurement, Tracking, and Evaluation
Assessing installation quality involves checking quantitative subfloor tolerance specs alongside visual surface alignment standards.
Subfloor Flatness Verification
Confirm subfloor variations remain strictly within one-eighth inch across ten feet using long straightedges before opening any flooring material boxes.
Relative Humidity Slab Testing
Verify concrete relative humidity levels remain below eighty-five percent using in-situ probe sensors before spreading full-spread vinyl adhesives.
Perimeter Expansion Gap Checks
Audit perimeter room edges prior to baseboard installation, confirming a continuous quarter-inch expansion space exists around all walls, pipes, and fixed vertical elements.
Common Misconceptions and Oversimplifications Common Kitchen Flooring Installation Mistakes
Correcting common installation myths helps homeowners and contractors avoid costly flooring mistakes.
Thick Underlayment Fixes Uneven Subfloors
Soft foam underlayment pads cannot fix uneven subfloors. Placing soft pads over subfloor dips increases floor bounce, breaking plank locking joints even faster.
Rigid Core SPC Flooring Is Unbreakable
While SPC cores are waterproof, thin click-lock edges remain fragile. Subfloor dips cause locked joints to shear under normal adult walking weight.
Existing Vinyl Can Always Be Covered Over
Laying new flooring over old cushion-backed vinyl creates an excessively soft subfloor base, causing new floating floor locking joints to flex, separate, and break.
Ethical, Practical, and Contextual Considerations
Executing durable kitchen flooring installations supports sustainable residential building practices. Avoiding premature floor failures prevents non-recyclable synthetic flooring waste from clogging local landfills.
Selecting low-VOC subfloor primers, formaldehyde-free adhesives, and Greenguard Gold certified floor planks preserves indoor air quality while protecting installation workers and household residents from toxic chemical fumes.
Conclusion
Mastering residential kitchen floor installations requires prioritizing rigorous subfloor engineering over hasty surface laying. Success depends on testing concrete subfloor moisture levels, leveling subfloor dips, preserving perimeter expansion gaps, and preventing floating floors from being pinned under heavy cabinetry. By prioritizing structural subfloor integrity, proper adhesive application, and environmental moisture control, installers and property owners create durable, beautiful kitchen floors that withstand daily household use for decades.